Search Me

Tuesday, December 24, 2019

Cottage Cheese Patties


Recipe by Peggy Ray, Tyler, Texas


This one comes from the Tyler, Texas SDA cookbook, courtesy of my friend Peggy Ray. Peggy comes up with some great recipes for potluck.  This one is a combination of oatmeal patties and cottage cheese loaf only it eschews the Kellogg's Special K in favor of oatmeal.  I had a bunch of cottage cheese and no Special K, so I went with Peggy's cottage cheese patties tonight. You really won't believe how good these things are. They have this incredible medley of flavors that is just amazing.  Here's how you do it.

Ingredients:
  • 1 c. cottage cheese
  • 1/2 small onion chopped
  • 3/4 cup pecans or walnuts
  • 1 tsp. soy sauce
  • 1 egg plus 1 egg white
  • 1/2 cup multi-grain cracker crumbs
  • 3/4 cup oatmeal
  • 2 pkgs (2 tbsp) George Washington Golden Broth or powdered chicken flavored broth
  • 1 can French's fried onions
Gravy:
  • 2 cans mushroom soup
  • 1 can of water
Directions:
  1. Mix all ingredients together in a large mixing bowl (except for the fried onions)
  2. Let set for 10 minutes or so after thoroughly mixed
  3. Form into patties and brown in oil. 
  4. Make up gravy in saucepan or skillet
  5. Pour small layer of gravy in bottom of a casserole dish.
  6. Add a light layer of French fried onions
  7. Lay patties over the top and drizzle the rest of the gravy over it.
  8. Bake for 25 to 30 minutes at 300 degrees.
  9. Layer on top with the rest of the French fried onions.
  10. Bake for 5 minutes more
Serving Suggestion:

Peggy Ray
Around here we just go ahead and have them for supper. If you're taking them to potluck, cover the casserole dish with foil or the lid that goes with it on Friday afternoon and refrigerate. Heat it up in the church warmer starting as soon as you get to the church on Sabbath morning so it's good and hot by lunch time. You might want to leave an extra pan of these at home because if you're like most potluck contributing cooks you line up last in line and by the time you get there the good stuff is gone and you're stuck with lentils and cabbage.

Thank you soooooooo much for this recipe, Miss Peggy. We love your culinary work.

Tom King

Wednesday, November 20, 2019

Jalapeno Popper Cheese Dip


This stuff is delicious. It’s not very hot at all and you can cut the amount of jalepeno in the mix or add more depending on your ability to tolerate hot peppers. Great for parties or you can put it on grill cheese sandwiches or even as a sauce for cheese enchiladas. It’s sort of a generic Mexican sauce/dip.
  
Ingredients 
 
  • 10 slices Stripples, Morningstar Farms Breakfast Strips, or a 8 oz of Artificial Bacon-Bits
  • 1 (8-oz.) block cream cheese, softened
  • 1 1/2 c. shredded cheddar
  • 1 1/2 c. shredded Monterey Jack
  • 1/3 c. mayonnaise
  • 1/3 c. sour cream
  • 1 tsp. garlic powder
  • 2 jalapeños, minced
  • Kosher salt
  • Freshly ground black pepper

Directions

For the oven
  1. Preheat oven to 350º.
  2. In an iron skillet or electric skillet at medium heat, cook vege-bacon until crispy. Drain on a paper towel. When cooled chop into small pieces. Of course if you use artificial bacon bits you just dump them into the mixture.
  3. Stir together cream cheese, mayo, vege-bacon (save a little for topping), sour cream, and garlic powder.
  4. Chop the jalapenos. Reserve some for topping the dip. Stir into mixture.
  5. Place mixture in casserole or serving dish. Add 1 cup of cheddar and 1 cup Monterey Jack.
  6. Season with salt and pepper to taste.
  7. Add the remaining 1/2 cups each of cheddar and Monterey Jack and stir together.
  8. Bake 15 to 20 minutes until dip is melted and golden and bubbly on top.
  9. Once the mixture is cooked, broil for 3 minutes to make the cheese on top extra-golden.
Serving Suggestion:

Serve with tortilla chips or baguette slices. Use as sauce for enchiladas or to make nachos.


Tuesday, October 1, 2019

Slow-Cooker Easy "Use Up Your Dried Beans" Chili

I had to transfer the chili from the crockpot to a larger pot because
I put too many beans in it and the swelled up and filled the crockpot
so that I didn't have room for the vegeburger and veges. I had to cook
it down the rest of the way on the stove which is trickier than doing
it in the crockpot. Moral of the story? Only file the crockpot to about
half or two-thirds with beans or you won't have room for the other stuff.


Slow-Cooker Easy
"Use Up Your Dried Beans" Chili
Prep: 20 minutes
Cook: 8 hours
Total: 8 hours 20 minutes
This makes a very nice vegetarian chili. We tend toward the milder sorts of chili around my house and for potluck purposes. I have built up an assortment of dried beans in my emergency pantry, so I kind of cleared out the shelves for this recipe. I didn’t really measure the beans so much as dump whatever was left in the bags into the crock pot. Also the veges were something of a catch as catch can. When I buy peppers, onions and such, I chop up any leftover veggies like that and dump them in a freezer bag and put them in the freezer. This time I dumped what was left of a bag of onions, a bag of green peppers, a leftover container of Rotel Tomatoes, a half tomato I cut and diced, some poblano peppers diced fine and a smattering of a little hot pepper I had bagged and frozen last spring. The recipe is pretty forgiving. I also dumped a can of diced tomatoes into it since I like my chili with a tomato flavor to it.
Ingredients:
  • 1 or 2 packages of dried pinto beans (soaked for 4 or 5 hours) Pintos are the usual base, but you can toss in other kinds of beans such as those listed below. Almost any beans will do (except maybe garbanzo beans or lentils unless you are really fond of those).
  • 1 packages of dried kidney beans, (soaked for 4 or 5 hours)
  • 1 package of dried black beans, (soaked for 4 or 5 hours)
  • 1 package of dried Navy beans (soaked for 4 or 5 hours)
  • 2 cans fire-roasted diced tomatoes (crushed tomatoes are also good if you like your chili tomato-ish) You can even just dice garden fresh tomatoes if your garden happens to be over-producing at the time.
  • 2 medium green Bell peppers or poblanos or whatever your favorite pepper happens to be or even whatever you happen to have in the fridge - chopped (about 3 cups chopped)
  • 2 medium yellow onions, red onions, or even green onions,, chopped (about 3 cups chopped) I like those Aggie sweet onions, Noonday onions or other sweet onions better than the more sharpish sorts of onions.
  • 2 medium cloves garlic, chopped, or you can just sprinkle in a tablespoon or so of garlic powder. I recommend starting with less and adding until you get the flavor you are looking for. I don’t like too much garlic in mine, but everyone has their druthers.
  • 2 tablespoons chili powder (again, start with less and work up to the full dose or more. - it kind of depends on how hot you like it).
  • 1 tablespoon of cumin. Cumin is another spice you want to add a little, taste it, then add a little more till you get it right.
  • 1 teaspoon dried oregano. Oregano is very forgiving, so I just dump it in and add more later if I’m in the mood for oregano.
  • Optional: 20 dashes Tabasco sauce (warning – this is VERY optional. I love the smell and taste of Tabasco, but not the heat. Stuff burns my tongue and I like to be able to feel my tongue when I’m eating chili. I’m kind of a No-Alarm chili sort of guy. I like just a little heat, but without the flame.
    Vegeburger (optional)
If adding vegeburger to it:
Brown a can of vegeburger or a bag of Morningstar Farms Recipe Crumbles with the veggies in olive oil after the beans are thoroughly cooked and simmer for another hour or so.
Directions:
  1. I like to do my beans first so that the veggies don’t overcook
  2. Fill the crock pot with beans, cover with water and add the dry spices, stirring it into the uncooked beans. Fire up the crockpot on low and let it cook for 8 hours. You can start it up in the morning and let it simmer while you’re off at work or, as I prefer to do, start it up at night and let it cook straight through till morning.
  3. When the beans are almost done, brown the vegeburger (if you are using vegeburger) and sautee the frozen or chopped vegetables with the vegeburger or by themselves if you’re not using vegeburger. Hold back on adding the Tabasco to the beans (if you are going to use Tabasco Sauce that is). When the beans are edible but could stand another hour or two to cook to a more tender state, add the vegeburger/vegetable mix and give it an hour or so to finish.
  4. Here’s the fun part if you’re the cook. Taste the chili to see if the beans are done and to determine if you need to add more spices. This is the part where the hand of the cook is most important. You can play with the flavor more easily because you are slow cooking the chili and don’t have to be in a hurry. If you add additional spices, they’ll have time to be absorbed into the beans and give your chili that “Wow!” factor.
  5. The cool part of crock pot cooking for potlucks is you can plug it in at church and leave it on low during Sabbath morning services, then when it comes time to serve, simply lift out the crock from the heating part, set it on a hot pad with a handy ladle and you’re ready to go.,
Serving suggestions:
  • Straight up – Just pour it in a bowls and eat it. You can add crackers or cornbread if you like. This is lovely stuff and you can have it as hot as you like. I’ve been known to add a gentle smattering of jalapenos when I brown the vegeburger to give this stuff a little kick, but mostly I don’t because of the gentler stomachs in the family
  • Topped - This chili is lovely with all sorts of toppings like diced avocado, fresh or dried cilantro, chopped raw onions, sour cream (vegan if you must), grated cheddar or Monterey jack cheese (or even vegan cheese if that’s your desire). Tabasco or Tapatio sauce or some jalapenos can be added to your individual bowl if you like it spicy hot.
  • Frito Chili Pie
    Frito Chili Pie - You can make a simple instant Frito Chili Pie by dumping Fritos in a bowl, pouring nice warm chili over it and covering with grated cheese or any other toppings over it. If you’d like you can lay down a bed of Fritos, cover it with beans and cheese and bake it in the oven till the cheese bubbles. This works really well for a potluck dish as you can bake it in a casserole dish and tuck it in with the other casseroles at the potluck for a nice Tex-Mex surprise.
  • Haystacks – This recipe also serves as the beans and vegeburger part of traditional Adventist potluck haystacks – the sort where one bunch brings the chips, another brings the cheese and someone brings the beans. Just make up a big crockpot or two of this stuff and there’s your contribution to the Adventist haystack experience. This chili recipe makes really wonderful haystacks.
  • Frozen -  The great thing about this stuff is that you can put the leftovers (if any) into ziplock freezer bags and toss it in the freezer.  I divided this batch into enough per bag to give us two bowls of chili per bag.  When we want chili, we just thaw it out in the fridge overnight or gently heat it in the microwave or a pan of hot water to loosen the chili, then slide it into a microwave safe bowl and then defrost it using the defrost settings. You can also heat it up in an electric skillet on low without burning it.

© 2019 by Tom King

Monday, April 8, 2019

Sheila's Bread Pudding


This is some stuff to make you sigh in contentment. I grew up eating bread pudding as a dessert. Mom made it in order to efficiently use aging bread as a dessert. This is not low calorie, low fat or gluten free.  It is, however, chocked with wonderful memories for me.  This is my Sweet Baboo's version drawing from several of our female ancestors' versions.

It makes a very nice transportable dessert since it lies flat in a casserole dish covered by plastic. Easy to heat. Delightful to eat.  I even make it sometimes with whole wheat bread to give you some fiber.


Ingredients:
  • 5 cups cubed white bread 
  • 3 eggs 
  • 1 cup sugar 
  • 1/2 cup melted butter 
  • 1/4 to 1 cup milk 
  • 1/2 tsp nutmeg 
  • 1/2 tsp cinnamon
  • 1/2 to 1 cup raisins (optional) 
Directions: 
  1. Cream butter, sugar and eggs 
  2. Add 1 tsp. each -vanilla and almond flavoring 
  3. Mix in bread 
  4. Add enough milk (up to a cup or so) to make the bread mixture mushy 
  5. Press it into a greased casserole dish 
  6. Bake at 350 degrees just until set. 
  7. Serve warm, room temperature or even cold with lemon sauce. 


Lemon Sauce: 

  1. In 1 quart sauce combine:  1 1/4 cups water, 1/2 cup sugar, 2 tsp grated lemon peel, 1/4 cup lemon juice, 1 1/2 TBSP corn starch. 
  2. Mix well. Cook and stir until thickened. 
  3. Then stir in two tablespoons butter or margarine Makes 1 3/4 cups sauce 


Serving Directions:

That's it. To serve, just plop a big old spoonful of this stuff in a bowl, pour some lemon sauce over it, and enjoy. The ingredients are sort of a medium version. You may want to adjust spices or ingredients to your tastes. There's a bit of "the hand of the chef" in this stuff. I even use whole wheat bread in mine. I tear up whatever bread is laying around including burger buns and hot dog buns. Bread is bread. And I double the lemon sauce because I like lots of sauce, but then that's me. Feel free to ignore any of my alterations. Mom's Bread Pudding never fails.

Sunday, December 23, 2018

Honeymama's Christmas Fruitcake

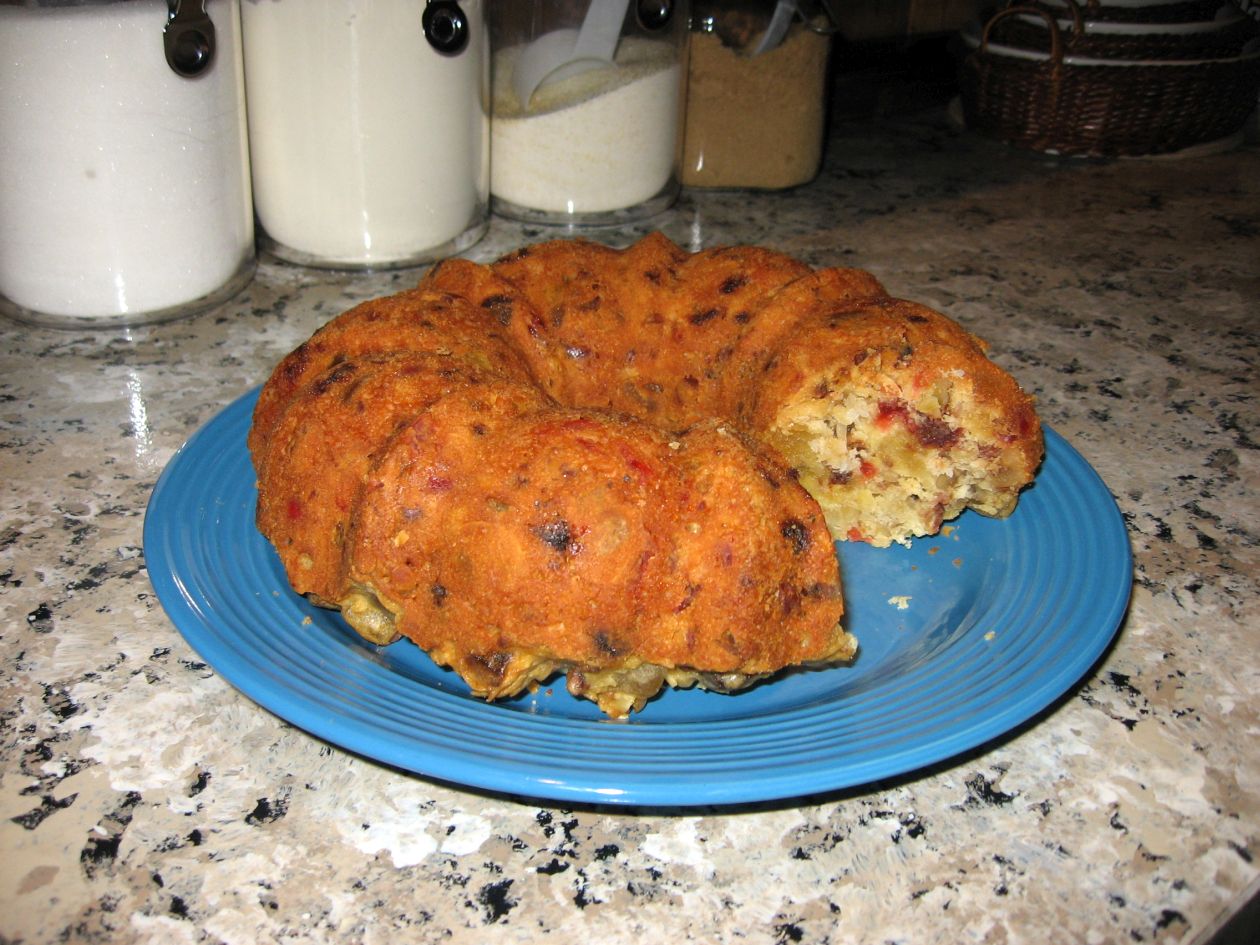
As usual, we hit that thang before I could run get the camera.


My grandmother, "Honeymama" as she was known by us grandkids, used to make her Christmas fruitcake every year sometime in November. By the time I first sampled her fruitcake, a firm tradition had been established. Every year the first piece of fruitcake went to my Aunt Sandra, her second child. None of us could touch the fruitcake till Sandra had eaten the first piece.  Aunt Sandra lived a good hour or two drive from Keene up on the prairie west of Springtown, Texas, north of Weatherford so she only came down once a month or so to check on her Mama.

One year, not long after my Grandfather passed away, Aunt Sandra got busy with business affairs and didn't come and visit her mama as often as Honeymom thought she ought to. I was sitting in her kitchen a few days before Thanksgiving, looking covetously at that fruitcake when all of a sudden my grandmother stood up, pulled a big knife out of the drawer and approached the fruitcake muttering darkly.

"If she can't be bothered to come visit her mother, I know someone who will appreciate a piece of fruitcake.

I couldn't believe it when she plunked a thick slice of fruitcake and a tall bottle of Dr. Pepper down in front of me. With a twinkle in her eye, she winked at me and went back to her early Thanksgiving preparations.

Honeymom gave a copy of her fruitcake recipe to Sheila years ago. I still have the handwritten copy. Apparently Honeymom got the recipe from "Aunt Dora", whoever that was. I should check the family tree to see who she was I suppose. Anyway, Sheila tweaks it a bit and no two fruitcakes come out exactly the same but they are all addictively delicious. She made two this year, the first with chopped dates which lasted about two weeks. The second time we didn't have dates so we made it with craisins (dried cranberries).  Feel free to have fun with the ingredients. It's a very forgiving recipe. I think the secret is that neither Aunt Dora, Honeymama, nor Sheila use citron in the recipe. It's a nice mild fruity and dense moist cake. I can't resist it.

Ingredients:  
  1. 4 eggs
  2. 2 cups sugar
  3. 1 cup melted butter
  4. 1 tsp. baking powder
  5. 2 1/2 cups flour
  6. 1 cup milk
  7. 1/1/2 cup walnuts or pecans
  8. 1 cup chopped dates, raisins or craisins
  9. 2 small boxes or 1 large box chopped candied pineapple 
  10. 2 small boxes or 1 large box candied cherries
  11. 2 cups grated fresh coconut
  12. 1/2 cup flour (dusted on fruit)
  13. 1 tsp vanilla extract
  14. 1 tsp almond extract 
  15. 1 tsp butter flavoring
  16. Spices to taste (nutmeg, cinnamon, cloves, ginger, etc.)
Directions:
  1. Preheat oven to 300 degrees
  2. Mix eggs, sugar, butter, and baking powder till smooth.
  3. Add 2 1/2 cup flour and milk
  4. Chop nuts and all fruit and toss in a large bowl with 3/4 cup flour
  5. Mix coconut into fruit mix
  6. Add spices till the batter tastes like you like it.
  7. Stir all together in a large bowl and fold into a large bundt cake pan (or a normal size bundt pan and a loaf pan) coated with butter
  8. Bake at 300 degrees for approximately 1 hour until a knife inserted into the cake comes out clean.
Serving Suggestions:

This recipe tends to run over the top of our bundt pan, so we put some of the batter in a loaf pan and made a "giftable sized fruitcake" (right) and avoided having to clean fruitcake batter off the oven racks. One hint given to us by seasoned fruitcake bakers: Fruitcake tastes best if you let it sit for a few days in a cool corner before you eat it. Wrap it in plastic and hide it from yourself. It's the only way it's going to make it more than 12 hours without you losing control and chopping off a hunk of it. My Honeymama used to let hers sit for up to two weeks or until Sandra showed up for her first-of-the-season fruitcake.  Serve with milk or either Coke or Dr. Pepper in the traditional bottle.

If you can bear to give away the smaller fruitcake, cut it in slices after it cools, then put the slices in one of those plastic gift boxes or cake tins. Walmart sells them in the Christmas wrap section. Just slap a bow and a tag on it and you have a fantastic gift most people with working tastebuds will love.


If you think you don't like fruitcake, you might want to try this fruitcake. The lack of citron really makes this a lovely collage of gentle, tasteable flavors and a tribute to the culinary genius of Aunt Dora, my Honeymama and my Sweet Baboo!
 
If you find you don't like this fruitcake, box it up and mail it to "Uncle Tom's Home for Homeless Fruitcakes".
We'll make sure your unwanted fruitcake will achieve its ultimate purpose in the grand cosmic scheme of things.

© 2018 by Tom King

.

Friday, June 1, 2018

Honeymama's Candied Dill Pickles

If you like sweet pickles at all, you'll love these.  My grandmother (we called her Honeymama) used to make these and whenever she had a jar in the fridge, I was there to mooch 'em.  Nothing better in the world than a longhorn cheese sandwich on whole wheat bread with Kraft Mayo, a slice of fresh tomato still warm from the garden and several candied dill chips.  She taught me how to make them, in self-defense I think, hoping I'd ease up on her supply. 

Oh, and you needed a tall cold Dr. Pepper in the return-for-deposit bottle to go with it. The beauty of candied dills is you almost have to make them yourselves. For some reason pickle makers have never mass produced candied dills for very long, if at all.

Here's what you need to make candied dills:

  • 1 giant jar of cheap hamburger dill pickle chips
  • 1 cup of sugar for each quart of the jar's capacity
  • 1 tablespoon of mixed pickling spice per quart
  • Vinegar (apple cider vinegar works nicely and gives it a unique flavor)
  • Cheesecloth
  • Twine

Here's what you do:

  1. Pour out the pickles into a collander and drain off the vinegar. 
  2. Rinse the pickles with fresh vinegar.
  3. Rinse out the pickle jar.
  4. Put the pickles back in the jar
  5. Pour part of the sugar into the jar. 
  6. Pour vinegar over it to dissolve the sugar.
  7. Alternate sugar and vinegar till the jar is about 3/4 full of vinegar.
  8. Measure 1 tablespoon of pickling spice onto a six inch square of cheesecloth.
  9. Wrap the cheesecloth around the spice and tie the open end securely with string.
  10. Tuck the spice ball down in the pickles
  11. Finish filling the jar with vinegar and the entire amount of sugar
  12. Put the lid back on and shove it to the back of the refrigerator
  13. Put a sign on the jar threatening to chop off the fingers of anyone who gets into the jar without permission.
  14. Shake up the jar every day or two to promote complete dissolving of the sugar on the bottom of the jar.  Open the lid and sniff. It doesn't help any, but it's good for your morale during the curing process. 
  15. Wait at least two weeks for the sugar and spice to permeate the pickles.
  16. About  a week into the process, make another jar or two. You will need them because if the first jar lasts a week I'd be surprised.
  17. Enjoy!
I make my own labels for these.  I wondered why no commercial pickler made candied dills for a long time. Then, I found candied dills made by a small local boutique pickler named "Annies". She sold them through a special display at Brookshire's and charged $7 a pint for them.  I used to buy them when I couldn't wait for a new batch to cure. They are that danged good!


Annie even sells one variety of candied pickles that have jalapenos in them. Those are really good too. I may try a batch of Honeymom's candied dills with a few jalapenos tossed in to give it a little kick. I'll let you know how it turns out.


Tom

Sunday, May 27, 2018

Vegan Cole Slaw


Vegan Cole Slaw
I came into possession of some vegan mayonnaise. I was skeptical at first but the stuff turned out to be really really good. Made with all the usual ingredients, the only thing different is the vegan mayo. It makes up to a huge bowl of Cole slaw for potluck. As with fresh made Cole Slaw, if you set it in the fridge overnight you may get some settling of the thinner parts of the dressing in the bottom of the bowl. Just toss it all again or pour off any water that settles and it’ll be great.

Dressing Ingredients:

  • 1 ¼ cup Vegannaise (vegan mayonnaise)
  • 1/3 cup sugar
  • 2 tablespoons cider or red wine vinegar
  • ¼ teaspoon celery seed
  • ½ teaspoon season salt or Creole seasoning
  • Salt to taste
  • 1 tablespoon fresh squeezed lemon juice
Slaw Ingredients:
- ½ head of green cabbage
- ½ head of purple cabbage
- 3 cups grated carrots.
Directions:
  1. Chop both cabbages
  2. Grate the carrots
  3. Toss with dressing in a large sealable bowl
  4. Refrigerate in a sealed bowl until ready to use.