Search Me

Thursday, December 7, 2017

Mammaw's Cream Corn

You'll notice I prepared this in a Wok. It's not because you
need a Wok to make it. It's just that I've worn all the non-stick
surfaces off the other skillets and I was using the cast iron
skillet for other things at the time. I prefer the cast iron skillet.


This is a nice vegetable dish for potluck. It's easy to make, tasty and easy to multiply. All you have to do is to multiply the ingredients. I'm a creamed corn fan. I wasn't when all I'd ever eaten was the canned stuff.

This is Sheila's recipe. She got it from her Mammaw. Mammaw was a tiny little elderly woman when I first met her. She wore her hair in a three foot long Indian style braid which she kept coiled on top of her head like a little tidy bird nest. She was a lovely woman and welcomed me to the family with open arms. She had a way with food. Like me, she tended to use every dish and pot in the kitchen when cooking, unlike Sheila who can make a 5 course meal and put it on the table without leaving any sign she'd ever been cooking. Like Mammaw, when I get done making a bowl of soup from a can it looks like the aftermath of firefight conducted by a division of US Marines.

Here's the recipe:

Ingredients:
  • Can of whole kernel corn and a can of creamed corn or 8-10 ears of corn
  • 4 oz cream cheese
  • 1/4 tsp salt
  • 2 tbsp butter or margarine
  • 2-3 tbsp flour
  • 1/4 cup evaporated milk
Directions:
  1. In skillet melt margarine
  2. Add cream cheese
  3. Sprinkle flour into the margarine until it begins thickening
  4. Slowly add evaporated milk and salt. Allow to thicken and cream cheese to melt.
  5. Pour in can of whole corn and a can of creamed corn. If you want it just like Mammaw's, use corn on the cob. You should scrape the whole corn kernels right off the cob with a good paring knife. Then you don't have to add any canned corn at all. 
  6. Allow to thicken. 
Serving suggestions:

If you make it up on Friday for a Sabbath potluck, simply put it in Tupperware® and heat it up in a skillet or microwave just before lunch. The whole kernel corn gives creamed corn some body. It's an easy side dish to go with the usual assortment of lasagna, enchilada casseroles, salads and main dishes.  Enjoy.

© 2017 by Tom King

Sunday, October 8, 2017

Kitchen-Aid Mixers - The Potluck Chef's Best Friend

The Mighty Kitchen-Aid Mixer!

If you do potluck cooking, you are frequently called upon to prepare food in mass quantities.
You can do this, of course, with quite ordinary kitchen have a lot of time on Friday's to get something ready for the church potluck next day, then I'm here to tell you....

Industrial strength kitchen tools are essential!

The one I'm going to talk about today is the inimitable Kitchen-Aid mixer. Let me warn you they are NOT cheap. We inherited ours from a friend when she passed away or I would never have known the joys of having the mighty Kitchen-Aid in our stable of kitchen tools.

This powerful and versatile stand mixer allows you to prepare stuff in a hurry or to multi-task, something we all have had to do when getting ready to feed hungry visiting academy choir. Here are some things specific to potluck preparation the size and power of the Kitchen-Aid allows you to do.
  1. Bread-making - You can go off and leave the dough hook kneading your while you peel potatoes and prepare the baking pan for your rolls or bread loaves.
  2. Potatoes - Great for whipping up enormous batches of mashed potatoes or potato salad.
  3. Cakes -  Homemade cakes and cobblers are easy to whip up with a stand mixer. Just toss all the ingredients into the mixing bowl and run with the batter attachment. You can do other stuff while the ingredients are mixed up.
  4. Vege-Meat/Food Grinder - The Kitchen Aid has a power hub and a bunch of attachments including a meat grinder. If you've  made up some gluten "wheat meat" or just want to make burgers out of something else like choplets or vegetable steaks. Just run it through and you've got burger.
  5. Cookies and biscuits - For heavier mixtures like cookie or biscuit dough, the batter attachment is a whole bunch easier for blending in shortening with flour and eggs and stuff of different consistencies. Makes a big bunch of biscuits or five or six dozen cookies.
  6. Whipped cream and meringue - For stuff that needs to be whipped up or beaten for a lengthy period like pudding, a mixer like this is great. With the whipping attachment, you can go off and leave it whipping while you work on something else. Works great.
  7. Pasta - There's a pasta-making attachment that lets you make all sorts of homemade pasta like
    spaghetti, egg noodles and lasagna noodles
  8. Ice Cream Maker - You can even make homemade ice cream with the ice cream attachment. Saves all that hand cranking or using the more awkward electric version of the hand-cranker. Great for small group parties or you can make it up and freeze enough for a potluck.
  9. Grain Mill - The grain mill attachment allows you to make flour from a variety of whole grains - oats, rice, soy, flax, almond, corn, and even dried coconut. Multi-grain bread is a lot of fun to experiment with and you can get all sorts of grains and nuts in the bulk foods section of many grocery stores.
  10. Food Processor - There is even a food processor attachment for chopping up vegetables and stuff.  Saves you some room on your counter and the attachment hardware is one tough magilla, unlike so many stand-along food processors.  
 
If you've got work to do, this invaluable tool helps you cook faster and better. The Kitchen-Aid is the Kirby Vacuum Cleaner of kitchen tools. Man, you gotta get yourself one of these!

© 2017 by Tom King


Stuffed Peppers

Roasted a couple of ears of corn along with the peppers.

I was planning on doing something else this week, but on Friday I happened upon someone with a crate of very nice green Bell peppers they were giving away, so I accepted ten of them with a vague notion of chopping and freezing them or, perhaps, stuffing them. I found a plethora of recipes online, so I cobbled together my own vegetarian version and it came out rather well. It was a bit tomato-ish for Sheila, but her digestive system is a wreck, so pay no attention to her negativity.

The recipe requires the following:

Ingredients: 
(Multiply as needed)
  • Four (or multiples thereof) Bell Peppers (any color is okay)
  • Salt (to taste - I just went with the salt I used to cook the rice)
  • 5 Tbsp olive oil (it's virginity level is up to you)
  • 1/2 tsp garlic powder
  • 1 medium yellow onion, peeled and chopped
  • 1/2 bag Morningstar Farms Recipe Crumbles or a can of vegeburger (LL, Worthington, etc.) 
  • 1 1/2 cup of cooked rice (I made half brown/half white rice)
  • 1 can chopped tomatoes, (drain liquid from the can)
  • 1 tbsp oregano (chopped, powdered or dried - go lighter on the powdered)
  • 1/2 cup Mozarella Cheese (optional)
  • 1/2 cup ketchup
  • 1/2 tsp of Worcestershire Sauce
  • Dash of Tabasco sauce (super optional)
Directions:
  1. Cook the rice according to directions. Adding a dash of olive oil and red wine vinegar keeps it from being sticky. Preheat the oven to 350ยบ.
  2. Remove the tops and cut out the seedy bits of the Bell peppers. Steam them till they soften. You can put them in a steamer for 8-10 minutes or do as I did and bake them for 10 - 17 minutes to soften them.
  3. Saute' the onions in a large skillet or electric skillet. Once they start to soften, add the Recipe Crumbles or vegeburger and brown lightly. 
  4. Add the rice and chopped tomatoes to the mixture and stir in. Add the mozarella and let it melt into the rice/vegeburger mixture.
  5. There are two ways to do the ketchup and Worcestershire Sauce. One is to mix it up in a bowl with a little bit of water (less than a quarter cup) and mix about half into the stuffing. The other is to wait and ladle it over the peppers after they are stuffed. I put half into the stuffing and saved the rest to put on top of the stuffed peppers.
  6. Stuff the peppers with the vegeburger/rice mixture. Put a spoonful of the ketchup/Worcester/optional Tabasco mixture on top of the peppers. 
  7. Place in casserole dish and bake 40-50 minutes till they look like the picture above.
    Serving Suggestions:

    Serve with another vegetable or salad and maybe some rolls. The peppers look a little wrinkly, but they taste good. You can play with the spices a little bit. Me, I'd have added a little Tabasco, but then I like the pepper flavor and a little heat with some dishes.

    If you have a late summer harvest of green peppers, you can make up multiple batches of the stuffing mix, core the peppers and make as many as you'd like to. It's kind of ambitious, but it's a nice single dish for a potluck. 


    © 2017 by Tom King


Thursday, September 28, 2017

Hot Fudge Sauce

If you're throwing a homemade ice cream making party or a banana split party, this great hot fudge sauce recipe is perfect to top your ice cream treats with. My wife got the recipe from a lady in Louisiana name Opal Martin.  Great for sundaes, banana splits and almost anything you’d like to put warm hot chocolate fudge on.  It only takes about 5 minutes to make.  This recipe is why I keep a supply of cocoa in the pantry at all times (this and the chocolate skillet cake recipe). I like more of a milk chocolate fudge myself and sometimes add a few tablespoons of evaporated milk when I make it.  Either way is terrific. Saved me many a trip to the grocery store when the missus gets a craving for a hot fudge sundae.  I keep the leftover sauce in the fridge in some little fruit jars I keep for leftover fudge sauce, sweet and sour sauce, homemade tartar sauce or homemade pimento cheese.You can reheat the sauce for a few seconds in the microwave. It's just lovely stuff.

Ingredients:

  •   1 cup sugar
  •   1/3 cup cocoa
  •   3 tbsp flour
  •   1/3 tsp vanilla
  •      ¼ tsp salt
  •     1 cup boiling water
  •     1 tbsp margarine

Directions: 
1.     Mix dry ingredients together in a saucepan
2.     Add boiling water while stirring
3.     Cook for 3-4 minutes stirring constantly.
4.     Store in covered jar in the refrigerator

Makes 1½  cups.

 Stores nicely in a mandarin orange fruit jar - just sayin'


(c) 2013 by Tom King

Saturday, September 9, 2017

Broccoli, Cauliflower, Corn Casserole


This recipe is a variant of an original recipe by Paula Deen. You may not know it, but Paula was raised and trained in the art of cookery by her Adventist grandmother. You can tell Paula studied under an Adventist cook, given her liberal use of cream of mushroom soup in her casseroles. This variant of her classic broccoli casserole adds a couple of vegetables I needed to use up so I could get the rest of the groceries from our monthly shopping trip into the fridge. Came out pretty good if I do say so myself.

Ingredients:
  • 10 oz. chopped broccoli and cauliflower cooked and drained
  • 1 tsp McKay's Chicken Seasoning
  • 1 cup mayonnaise
  • Small package frozen corn cooked and drained
  • 1 cup grated sharp cheddar cheese
  • 1 can of cream of mushroom soup
  • 2 eggs lightly beaten
  • 2 cups crushed crackers
  • 2 tablespoons butter
Directions:
  1.  Preheat oven to 350 degrees.
  2. Spray a 13 by 9 inch baking dish with vegetable oil cooking spray
  3. Combine broccoli, cauliflower and corn and mayo in a large mixing bowl.
  4. Add cheese, soup and beaten eggs. Mix well with large metal spoon.
  5. Place the mixture in the baking dish and top with crushed crackers.
  6. Pour melted butter over the top of the crackers
  7. Baked for 35 minutes or until set and browned.
Serving Directions:

Let the casserole brown good on top if you are serving it now.  Otherwise lightly brown if you are making it the day before to be reheated for potluck. This will allow it to brown fully just before serving.

Friday, August 25, 2017

Chocolate Skillet Cake

You'll notice a piece is missing. It's hard to get a picture
of a whole chocolate skillet cake. You go get the camera
and by the time you get back it looks like this.
Today's recipe is not low fat, sugar free or vegan.
It goes a long way because it's kind of rich. You
need an iron skillet to cook it properly. I make it pretty regularly, but it never lasts very long. It's a nice moist, crumbly single layer cake. Just leave it in the skillet and server it from there. This one you'll want to take to a potluck sometime for the dessert table. Just cut it in pretty small pieces. Like I said, it's kind of rich.

Cake Ingredients:
  • 1 cup flour
  • 1/2 teaspoon baking soda
  • 1 cup sugar
  • dash salt
  • 1/4 cup (1/2 stick) butter
  • 1/4 cup vegetable oil
  • 2 tablespoons cocoa powder
  • 1/2 cup water
  • 1/4 cup buttermilk
  • 1 egg
  • 1/2 teaspoon vanilla
Frosting Ingredients:
  • 1/4 cup (1/2 stick) butter
  • 2 tablespoons cocoa
  • 3-4 tablespoons milk (as needed for consistency)
  • 1/2 cup pecans, chopped
  • 2 cups powdered sugar
  • 1/2 teaspoon vanilla
Directions:
  1. Preheat the oven to 350 degrees F. In a large bowl, whisk flour, baking soda, sugar, and salt together and set aside.
  2. In a 10-inch cast iron skillet, bring the butter, vegetable oil, cocoa powder, and water to a boil. Remove it from the heat and whisk in the dry ingredients well. Mix in the buttermilk, egg, and vanilla. Bake in the skillet cake at 350 degrees F for about 15-20 minutes or until a toothpick comes out with just a few moist crumbs.
  3. While the cake starts to cool, make the frosting. In a medium saucepan, bring the butter, cocoa, and milk to a boil. Remove them from heat and add the sugar, nuts, and vanilla to the hot frosting mix. Stir to combine. Pour over the warm cake, spread with a spatula, and serve with vanilla bean ice cream, caramel sauce or whipped cream.
Serving suggestions:
  • Ice cream
  • Caramel sauce (this one is delicious!)
  • Whipped cream

Note: 

If you let the frosting boil a bit longer,
when it cools it's like a stiff Hershey bar top.


If you bring the frosting to a rolling boil it will give you a frosting the consistency of a chocolate candy bar as shown to the right. Man, that's just the literal frosting on the cake. Like I said I'm not a big cake fan nor much overwhelmed by chocolate, but this stuff is like catnip for people around our house. I made it yesterday. There are only two of us. I'm a diabetic and can't eat this and there's almost 2/3 of it gone today. I'm taking extra Glipizide. And before you say it, I know. I was weak!

It's as good as it looks.
It's kind of a cross between chocolate cake and a frosted brownie.

Tom


Saturday, August 12, 2017

Make Your Own "Wheat Meat"


Wheat Gluten

Kneading the dough
If you're vegetarian or an Adventist who wants to not look like a heathen at church potluck, you probably eat tofu or soy products. Tofu is easy to find. Most grocery stores carry it and it's a good protein source that is relatively easily to find. You can get it in most grocery stores. The trouble is that tofu is not really firm enough to work with as a meat substitute. Wheat gluten is a great addition to a vegetarian diet. Like tofu, wheat gluten is a vegetarian protein source. Like tofu wheat gluten or "seitan" also originated in Asia. Unlike tofu, however, seitan, sometimes called "wheat meat", has a satisfying, firmer texture that makes it work in ways tofu doesn't work well. Seitan can be used in casseroles, on the grill, or cooked up and added to Chinese food or on sandwiches. Seitan isn't seen very much in most supermarkets, but fortunately, it's easy to make your own wheat gluten steaks at home. Grocery stores that sell bulk items often carry high gluten wheat flour that makes it way easier to make your own seitan. If not, you can make it from unbleached flour by washing it. I know that sounds weird, but this recipe shows you how.

Note
: If you do have celiac disease or other gluten sensitivities should not eat wheat gluten. Otherwise it's an excellent source of vegetable protein.
Let stand for five minutes after the water is white and opaque.
How to Make Your Own "Wheat Meat"
Ingredients and Tools Needed: 
  • All-purpose unbleached flour
  • Whole wheat flour 
  • Water
  • Chicken, beef or other seasoning according to taste (you'll have to experiment)
  • A large mixing bowl (Kitchen-aide mixer is even better
Basic Recipe (multiply amounts as desired):

  1. Mix two cups unbleached white flour with two cups whole wheat flour in a large mixing bowl. 
  2. Add enough water to make the flour the consistency of bread dough. 
  3. Knead the dough about 20 minutes with a dough hook or by hand to fully develop the gluten. 
  4. Put the dough ball in a large bowl and cover it with water.  Place in the refrigerator overnight. 
  5. Remove the dough from the fridge, pour out the water you soaked it in and cover it with lukewarm water. 
  6. Knead the gluten dough under the water. The water will turn white as the starch is released. Wait five minutes, pour out the water and refill the bowl. Knead the dough again till the water is white. Wait five minutes, pour off the water and knead again. Keep repeating until the water no longer turns white. 
  7. Cut the gluten dough into pieces. The dough should be a little rubbery by now. Cut it into the size and shape you have in mind - patties, cubes, strips, or balls as desired. The gluten will grow almost double in size during the next step. 
  8. Make a big pot of boiling water with seasoning added so that the gluten will absorb the flavor. Add the gluten pieces to the pot. Make sure they are fully covered by the broth. Simmer the gluten for about two hours. You will need add water the gluten soaks up the broth.
Serving Directions:
Keep pouring off the starch water till it runs clear.
Once it's done you can chicken fry it, chop it and saute' it with vegetables, barbecue it or use it virtually anywhere you'd use meat.  It has the texture of meat and costs you just a few pennies to make. You can store the gluten in a plastic Tupperware or glass container with a sealed lid. Pour some of the liquid you simmered it in over the gluten pieces and seal it up. It will keep for up to a week in the fridge.  You can also put it in freezer bags and freeze it.  It does take a while to make, but if you learn how to do it, it's worth your time.
Roll out the dough and cut it up in pieces
then simmer for two hours (picture at top of page)
If you go with the high-gluten flour, you don't have to wash the flour. You just make up the dough, knead it, cut it up and boil it in the pot with seasonings. It's a lot quicker and less time consuming.

Anyway, it's nice to know you can make it up and don't have to drive all the way to the ABC or wait for the ABC truck to come to the church or pay Amazon's exorbitant prices. And it's fun to do at least once so you can brag at potluck that you've made your own gluten (not that you'd brag about that sort of thing or anything).

Saturday, June 24, 2017

Sandwich Stuff - Olive and Pimento Cheese

All dressed up and ready to go!

I'm kind of a sucker for pimento cheese. It's always been a favorite of mine, but the tubs the commercial stuff comes in are either too small or too expensive, although I have been guilty of buying the giant size Prices' Pimento Cheese when I could get it. Hardly anyone sells it or understands pimento cheese up here in the Pacific Northwest, so I have been reduced to making it myself. This is one of my experimental version with which I am pleased.

It's kind of an "all-in" / clean off the cheese shelf kind of versions of this popular (at least in my neck of the woods it's popular) sandwich spread.  Every wedding has to have little triangular tuna sandwiches and little triangular pimento cheese sandwiches, so if you're doing a sandwich supper for the potluck gang, here's the first of several really good sandwich fillers.  I've already given you Sheila's vege-chicken salad. This goes great as a partner on the buffet board.

Ingredients:
  • Medium Cheddar Cheese (more of this than the others - you need that cheddary flavor)
  • Velveeta Cheese
  • Cream Cheese
  • Swiss or American Cheese or whatever other cheesy oddments you have left on the cheese shelf in the fridge. The more the merrier I think.
  • Mayonnaise
  • Green olives (stuffed with pimento)
  • Black Olives
  • More Pimento if you like lots of pimento
  • Sweet pickle relish
  • Pineapple (alternative to olives and pimento)
Directions:
  1. Cut up the cheeses into cubes and place them into a food processor with the chopper blade set. Don't fool with the grater attachment. It's messy and unnecessary.
  2. Chop the cheese into chunky bits.
  3. Add a spoon or two of sweet pickle relish and bump the "pulse" button
  4. Add pimento and olives and bump the pulse button until everything is chopped. .
  5. Add Mayonnaise and bump the food processor a few times till it's blended in.
  6. Scrape it all into a nice Tupperware bowl (I like the glass ones best), put the lid on it and you're ready to take it to potluck with your vege-chicken salad.
  7. You can pretty much leave the rest of the recipe the same only leave out the olives, pimentos and pickle relish and substitute pineapple chunks and you have Pineapple Cheese. It is a little more sweet than your usual pimento cheese spread. It's a little different taste, but I really like the pineapple variant of this recipe. Warning! Don't mix pineapple and olives. The chemistry of the two doesn't mix well. I tried it. It's kind of bitter.
Serving Suggestions:

This is really good on those triangular sandwiches all made up in advance or you can just take the tub along and let folks make their own sandwiches with it.  It also makes a nice dip kind of spread to put in the center of your vegetable and chips tray next to the French onion dip. I personally use Wheat Thins or tortilla chips to steal bites of pimento cheese out of the fridge even before we get to potluck.

As soon as I get me a can of Vege-links, I'll post my Vege-Weenie Sandwich Spread. It's really good stuff and makes a nice companion sandwich spread to pimento cheese. Meanwhile fool around with the recipe till it works just the way you wanted to. I knew a lady once who bulked her pimento cheese up with some kind of Jello. Not sure what flavor or whether it was unflavored gelatin, however she did it, it was really good stuff! So experiment yourself and come up with your own secret recipe.

Then don't forget to share it with me.

© 2017 by Tom King

Saturday, June 17, 2017

Vege Chicken Wings


This was an experimental dish I tried with some Morningstar Farms Chicken Strips. It's pretty simple and my head chef tasted it and approved, so you know it's good. The MSF strips are pretty small, but you could adapt the recipe to use cut up strips of Fri-Chik or pretty much any other vege-chicken substitutes including both canned or frozen types. The trick is how you prepare it.

Ingredients:
  • Vege-chicken strips or cut into strips
  • Two eggs
  • 3 tbsp milk
  • Martha White cornbread mix (no lard in that one)
  • 1/8 cup flour 
  • Pinch of salt (to taste)
  • Vegetable oil
Directions:
  1. If frozen, thaw the chicken strips
  2. In Fry-Daddy or deep pan, heat vegetable oil - enough to cover the strips
  3. Set out two wide flat bowls 
  4. In the first bowl mix two eggs and the milk - stir with a whisk
  5. In the second bowl, pour the box of cornbread mix and flour and salt if desired
  6. Lay out the vege-chicken strips or cut up the vege-chicken pieces into strips 
  7. Set the vege-chicken strips into the egg wash bowl. Coat the pieces evenly with the egg wash. I cover the bowl with a plate and shake it so everything gets covered.
  8. Put the strips into the cornmeal mix and flour mixture and coat the strips evenly.
  9. Place the strips into the hot oil and fry them till they are golden brown. 
  10. Drain the cooked pieces on layers of paper towel to absorb excess oil.
Serving suggestions:

Eat them like you would chicken wings. They make a nice appetizer or part of a snack tray or as a main course. I even got to try out an odd bottle of wing sauce somebody gave me. Hot but tasty. You can also make dipping sauces with those little cups like they give you at the Mexican restaurant. You can buy them four for a buck at the Dollar Store.  They go great with ranch dressing, barbecue sauce (Bull's Eye or KC Masterpiece is the best), sweet and sour sauce or wing sauce.

See, even vegetarians can have fun foods!

© 2017 by Tom King


Monday, June 12, 2017

Vegeburger Marzetti


Vegeburger Marzetti


This recipe comes from Sandy Hancock Weir who comes from my little Adventist college home town - the home of many an excellent vegetarian recipe. I'm going to make this one soon and I'll get back to you on my personal opinion, but in reviewing the ingredients and preparation techniques, I see no way this won't taste absolutely wonderful. Sandy says this one is a family favorite and you can hardly go wrong with someone's family's favorite Adventist potluck recipe. Sandy thoughtfully sent along photos of the stages of the Marzetti-making process. I love Adventists cooks. No one prepares food with more love and enthusiasm. Don't you just love living in America where a Texas Adventist gal of English lineage is an expert cook with an Italian dish as her specialty? Now THAT is how the melting pot works!

Ingredients:
  • 1 Medium onion (finely chopped)
  • ½ cup chopped celery
  • 3 Tbs olive oil
  • 1 can Worthington® Burger
  • 2-14.5 oz can Hunt’s Diced Tomatoes with
  • Rosemary & Oregano or Basil, Garlic & Oregano (I use one of each)
  • 1-2.25 oz can Black Olives - sliced
  • 1-6 oz jar Mushrooms - sliced
  • 3 cups Cooked Barilla® Thin Spaghetti
  • 1-32 oz bag Grated yellow cheese
Directions:
  1. Use a Dutch oven to cook the spaghetti. When done drain and set aside. 
  2. Using the same pan, add the onion and celery and simmer in oil until soft. 
  3. Add burger, tomatoes (and juice), mushrooms, black olives and spaghetti. 
  4. Fold mixture together until well mixed. 
  5. Spoon ½ of mixture in a large baking dish and cover with a layer of grated yellow cheese. 
  6. Pour remaining mixture over cheese and top with another layer of cheese. 
  7. Bake at 350 for 40-50 minutes. 
  8. Let sit for 5-10 minutes after you take it out of the oven to let the cheese harden. It is hard to get out of the dish otherwise.
Serving Suggestion:

Serve with a salad, Italian dressing, garlic toast or French bread, and a drink.
Serves 12-15 at potluck - (Less if served at home, and using larger portions)

©  2017 by and with thanks to Sandy Wier, San Antonio, TX for the recipe. 


Wednesday, May 31, 2017

Pizza Ring


Here's a kind of spectacular dish that looks really good on the potluck table.  It's not terribly hard to make and just requires a few basic ingredients and some very simple tools.  I've included a link to a video showing a version being prepared. The one I did is healthier and lacto-ovo vegetarian. Really it's just a pizza crust wrapped around some tasty stuff in the middle. Here's how it goes.

Ingredients:
  • Pizza crust  (Here's the basic recipe - I use 1 1/2 cup white flour and 1 cup whole wheat flour in my variant of the dough recipe).  If you've got a stand mixer with a dough hook, it's really easy. You don't have to let the dough rise.
  • 1 pkg. - Cream cheese (I like Neufchatel myself)
  • 1/2 pkg - Morning Star Farms Vege-Steak Strips®
  • 1/2 red or green bell pepper chopped or cut in strips
  • 1/2 large sweet onion chopped or cut in strips
  • 1/2 jar pizza sauce
  • 1 cup Mozarella (vary according to your taste)
  • 1 egg
  • 3 tbsp milk
  • Oregano
  • 1 tsp olive oil
  • Cheese sauce or your favorite marinara
Directions:
Ready for the oven

  1. Preheat oven to 400°
  2. Roll out pizza dough on pizza pan or stone
  3. Cut three 4 inch cuts in the center of the dough with a pizza cutter. The three cuts should cross at the center and make six wedge shapes with the points at the center.
  4. Place a dollop of cream cheese in each of the wedges halfway between the center and the edge of the dough. Spread it with a spoon or spatula to make a ring of cream cheese.
  5. In a skillet, brown the vege-steak strips and spread evenly over the cream cheese circle.
  6. Caramelize the onions and peppers on low heat in the skillet and then spread them over the vege-steak and cream cheese evenly around the circle.
  7. Spread pizza sauce lightly over the top of the mixture around the ring.
  8. Cover the ring of filling with mozzarella cheese.
  9. Fold the outside edge of the dough up over the filling and let the dough make a large flute opposite the base of each center cut. 
  10. Lift the tips of the inner wedges as shown in the video up and over the outside dough and press into the dough. Press the flutes down against the wedges to help hold the ring together firmly.
  11. Make an egg wash with an egg and milk. Whisk till smooth, then spread the egg wash over the top of the dough to give in that golden brown color you want.
  12. Bake 20 minutes or until the top turns a nice golden color.
  13. Make up the cheese or marinara sauce you like best.
Serving suggestions:

It's a ring. Put something in the middle. Serve it on the pizza pan or a pizza stone. Place a bowl with a nice sauce in the center as shown above.  It can be reheated, but I wouldn't recommend the microwave for the job or the dough gets rubbery.  Provide guests a sharp knife for cutting a slice of the ring and a spoon for the sauce. 

The pizza ring is pretty impressive for the work involved, and it's tasty too and, of course, we don't make this kind of thing to show off at church potluck.  Do we?

Click on this link to see a video of how this is made. I changed the recipe some to suit me, but once you see the basic steps you can easily adapt it to your personal tastes.

© 2017 by Tom King

Friday, May 26, 2017

Wilted Spinach Salad


Here's an old fashioned recipe with fresh spinach, boiled eggs and a vegetarian substitute for bacon drippings. Worthington Stripples or Morning Star Veggie-Breakfast Bacon Strips and the oil you cook them in make an excellent substitute for bacon drippings such as our grandmothers used in their "salad".  It can be partially prepared the previous day and all you need is to heat up the dressing just before serving. It's actually quite good and an unusual salad for potluck.  

Ingredients:
  • 6 cups spinach, washed, drained very well and torn into bite-size pieces
  • 1⁄4 cup sliced green onion
  • 3 hardboiled egg, coarsely chopped
  • 5 slices Stripples, cooked and chopped
  • 1⁄4 cup red vinegar
  • 2 tablespoons sugar
  • 2 tablespoons water
  • 1⁄2 teaspoon salt
  • 1⁄4 teaspoon pepper (optional)
Directions

  1. Combine spinach, onions and eggs in a large salad bowl.
  2. Cook Stripples/Breakfast Strips in skillet until crispy; remove and drain on paper towels.
  3. Pour off all but 3 tablespoons of oil you cooked the Stripples in.
  4. Add vinegar, water, sugar, salt and pepper to the oil and heat to boiling, while stirring to blend evenly.
  5. When ready to serve, pour over spinach mixture and toss gently.
  6. Sprinkle salad with Stripple/breakfast strip crumbles. 
Serving Suggestions:

Put the eggs, fresh spinach and green onions in a large Tupperware bowl and seal it up.  Set aside the cooked vege-bacon and go ahead and boil the sauce. Set it aside in a small sealed container. When you get to potluck, open up the greens, heat the sauce in the microwave until warm and pour it over the greens, onions and eggs mix. Crumble the crisp vegebacon over top of the salad and serve.

It's actually quite good and worth the effort of doing the last minute prep work.

© 2017 by Tom King

Saturday, May 20, 2017

Ten Layer Mushroom Lasagna


You could call this a "Dump" Lasagna, as it is made with a lot of stuff I had lying around the house and is loosely adapted from a Campbell Soup label recipe. It's actually pretty good right out of the oven and probably will taste better after it sits overnight in the fridge and is reheated. If you are not a mushroom fan, there are plenty of ways to substitute the elements of this recipe (see "Variations" below). It's not as hard to make as you think and doesn't take very long to put together. And most of us vegetarian cooks have most of this stuff already in our pantries.

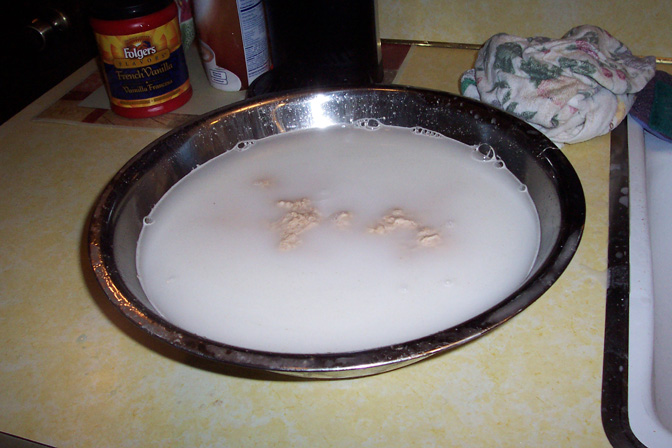
First three layers - noodles, cottage cheese and sauce
This recipe is an equal opportunity offender. The recipe uses milk, mozzarella, provolone, and cottage cheeses (which upsets the anti-dairy Vegans), pasta with gluten (which sends the anti-gluten crowd into low Earth orbit), and sets off the anti-mushroom folk with it's use of mushrooms and mushroom soup (which sets off the anti-salt faction). It uses vegeburger which sets off the anti-soy crowd. One would think I set out to make a dish that is certain to draw criticism. Actually, I just like lasagna and don't care what the food Nazis think. It's healthier than lasagna with hamburger or Italian sausage in it, so I am content.

Lasagna is a fun dish to get creative with if you have any head at all for substitutions. You could, for instance, substitute fresh spinach for fresh mushrooms. You can take out the cottage cheese if you want and just use the mushroom soup sauce or do it the other way round. You probably shouldn't substitute chocolate chips for the vegeburger, though. That would be silly.

Have fun with this and see you at potluck!

Ingredients:
Layers 4 & 5 - Sliced Provolone & slice mushrooms

  • Sliced black olives
  • 1 cup Mozzarella Cheese
  • 1 jar of your favorite spaghetti sauce
  • 1/2 bag Morningstar Farms Recipe Crumbles
  • 1/4 chopped onion
  • 1/2 chopped Bell Pepper
  • 1 can Mushroom soup 
  • 1/4 cup milk
  • 9 Lasagna noodles 
  • Sliced fresh mushrooms or small jar of mushrooms drained
  • 2 slices Provolone Cheese (or more mozzarella)
  • 1/2 large carton cottage cheese  
Directions:
Layer's 6-9: Mushroom sauce, noodles vegeburger
and spaghetti sauce

  1. Heat over to 400 degrees.
  2. If the lasagna noodles you use are not "oven ready", you'll need to prepare the noodles according to the package directions. I used both oven ready rice gluten-free rice lasagna noodles and regular whole wheat lasagna noodles because that's what I had. I put the oven ready noodles on the bottom of the casserole dish and put the wheat noodles on to boil.
  3. In a skillet put a little olive oil and heat. Add Griller Crumbles, onion and bell
    Griller crumbles, onion and peppers sauteed in olive oil.
    pepper and brown the crumbles and soften the onions and peppers. 
  4. First layer - In a large casserole dish, cover the bottom of the casserole with lasagna noodles.
  5. Add second layer - Spread cottage cheese over the noodles.
  6. Add third layer - Spaghetti sauce over cottage cheese, spreading evenly.
  7. Add fourth layer - Provolone strips or mozzarella strips laid flat on top of what you have so far.
  8. Add fifth layer - Mix can of mushroom sauce and 1/4 cup milk and pour over mixture.
  9. Add sixth layer - Slice fresh or canned mushrooms and spread sliced 'shrooms over the top of the cheese slices.
  10. Add seventh layer - Spread lasagna noodles over the top of the 'shrooms.
  11. Add eighth layer - Spread vegeburger crumbles, onions, and pepper mixture over the top of the noodles.
    Layer 10: Cheese and olives - ready to pop in the oven
  12. Add ninth layer - Spread spaghetti sauce over vegeburger layer
  13. Add tenth layer - Sprinkle mozzarella evenly over all and sliced olives over that. I count them as one layer, though technically those few olives might make it eleven layers. I just like the symmetry of ten layers.
  14. Bake for 30 minutes at 400 degrees till sauce bubbles and cheese is melted.
  15. Switch oven to "broil" and broil at high for 2 minutes. Watch closely or it will burn on top. This helps brown the cheese a little bit and looks nice.
Serving suggestions:

Set the casserole on a hot pad to cool and cover with aluminum foil or the casserole lid if you have one. Once it reaches room temperature, you can put it in the fridge overnight, which will allow the flavors to spread throughout. Heat it to 170 degrees in the oven or warmer about an hour or so before potluck.

Variations:

You can actually leave out any of the layers you want to. If you hate mushrooms, leave 'em out or substitute something else. You can make a basic cream sauce or use another cream sauce with any flavor you think suitable. This recipe uses less cheese, so you can substitute extra cheese for the mushroom soup sauce if you want. You can leave out the vegeburger or substitute Loma Linda or Worthington vegeburger, with or without the onions and peppers. You can even substitute spinach for the fresh mushrooms if you want. It works pretty well any way you want to (except, of course, with chocolate).

(c) 2017 by Tom King


Friday, May 19, 2017

No Sugar Added Apple Pie


This is an experimental Apple Pie which hopefully doesn't send my blood sugar into low Earth orbit. It's made with 100% white grape juice and a sprinkle of Stevia in place of sugar. The apples are fresh. I peeled them with my handy dandy apple peeler and corer machine, a bit of kitchen tool self-indulgence I picked up a year or two ago. The pie is tasty, but not overly sweet. Here's how I made it.

Ingredients:
  • 5 apples peeled, cored and sliced.
  • 3/4 cup of water
  • 1/2 cup white grape juice
  • 1 tsp. allspice
  • 2 tsp. cinnamon
  • 1 tsp. margarine or butter
  • 1 tbsp corn starch
  • 2 tbsp flour
  • 2 pie crusts
  • Spray oil
Directions:
  1. Place water, grape juice, allspice, cinnamon, corn starch, flour, in large pot and heat till blended.  
  2. Add apples to the mix and bring to a low boil.
  3. Spray the pie pan with oil and spread bottom pie crust over the pie pan.
  4. Fill the crust with the apple mix.
  5. Sprinkle the apples mix with Splenda or Stevia. Spread small dots of margarine or butter over the top of the filling.
  6. Spread the top crust over the bottom, flute the edges to seal the top and bottom.
  7. Cut 5 evenly placed slits in the top crust to vent while baking
  8. Bake at 350ยบ until the crust edges and top crust begin to brown
  9. Cool for an hour
Serving Suggestion:

It's really good pie, warm with a dollop of vanilla ice cream (sugar free for me).  It's lightly sweet and the cinnamon and butter makes it pop.

© 2017 by Tom King

Sunday, May 14, 2017

Vege-Chicken Rotini Alfredo


This one's quick. You can make your own Alfredo Sauce. It's not very difficult. If you're in a hurry, Paul Newman's Alfredo Sauce works great. You can stir it all up ahead of time on Friday and the flavors will be thoroughly infused throughout the dish by potluck on Sabbath.

Ingredients:
  • Bag of Rotini (I like the whole wheat kind)
  • Jar of Alfredo sauce.
  • Morningstar Farms Vege-chicken Strips
  • Olive oil
  • 1/2 large onion chopped
  • Chopped Bell pepper

Directions:
  1. Prepare the Rotini according to directions - al dente' is best. When done, drain in collander.
  2. In a large skillet, saute' onions and Bell pepper and vege-chicken strips in olive oil, till the vegetables are caramelized and the strips begin to brown.
  3. Pour in Alfredo sauce and heat until it starts to bubble.
  4. Pour Rotini into a casserole then pour the sauce over the pasta and stir it up. 
  5. (Optional) If you'd like to crisp up the top of it, you can scatter black olives, croutons, French-Fried onions or even club crackers over the top.
Serving Suggestions:

Cover and refrigerate overnight or eat it hot right out of the pan.  If you premake it to carry to potluck, simply reheat it in the church warming oven or heat in the oven (better) or in the microwave to 170 degrees internal temperature.

© 2017 by Tom King